

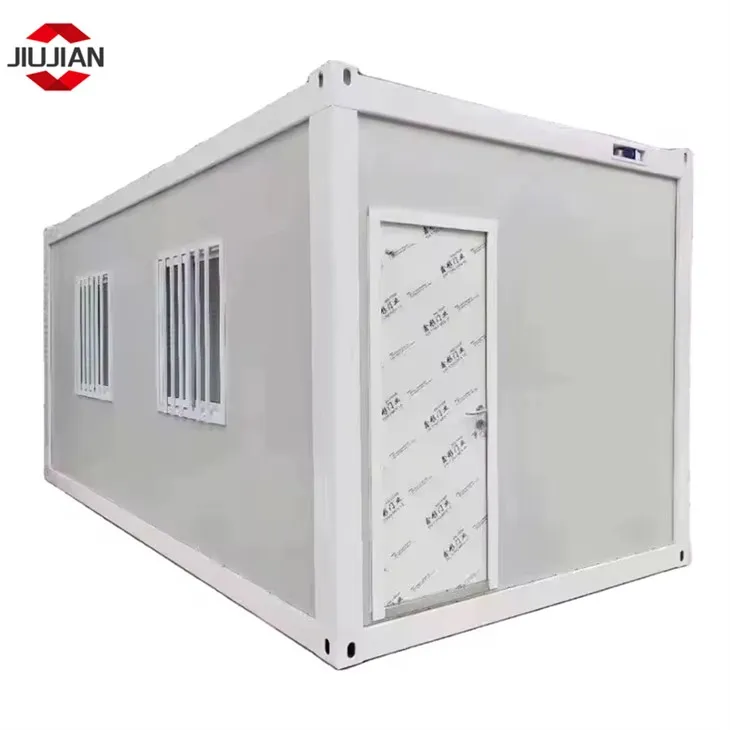
Installing a fence around a modern container house is not only a practical way to enhance privacy and security but also an aesthetic addition that can elevate the overall look of your property. As a modern container house supplier, I've witnessed firsthand the transformative power of a well - installed fence. In this blog, I'll guide you through the process of installing a fence around your modern container house, step by step.

Step 1: Planning and Design
The first and most crucial step in installing a fence is planning. Start by determining the purpose of your fence. Are you looking for privacy, security, or simply to define the boundaries of your property? For a modern container house, a minimalist and sleek fence design often complements the contemporary aesthetic.
Measure the perimeter of your container house where you plan to install the fence. Use a tape measure to get accurate dimensions. Make sure to account for any obstacles such as trees, rocks, or utility lines. You can mark the boundaries with stakes and string to visualize the fence layout.
Consider the local building codes and regulations in your area. Some municipalities have specific rules regarding fence height, materials, and setbacks from the property line. Contact your local building department to obtain the necessary permits before starting the installation.
When it comes to design, you have a variety of options. For a modern look, you might consider a metal fence, such as aluminum or steel. These materials are durable, low - maintenance, and can be customized in different styles. Another option is a vinyl fence, which is also easy to maintain and comes in a range of colors. If you prefer a more natural look, a wooden fence can add warmth to your modern container house. However, wood requires more maintenance, such as staining and sealing, to prevent rot and decay.
If you're interested in seeing how a modern container house with a fence can look in combination with furniture, check out Modern Container House with Furniture. It showcases some great examples of well - designed container houses.
Step 2: Gathering Materials and Tools
Once you have a clear plan and design in mind, it's time to gather the necessary materials and tools. The materials you'll need depend on the type of fence you've chosen. For a metal fence, you'll need metal panels, posts, brackets, and concrete for setting the posts. If you're going with a vinyl fence, you'll require vinyl panels, posts, connectors, and a post - hole digger. For a wooden fence, you'll need wooden planks, posts, nails or screws, and a saw.
In addition to the fence materials, you'll need some basic tools. These include a post - hole digger, a level, a hammer or drill, a tape measure, and a wheelbarrow for mixing concrete. Make sure to wear appropriate safety gear, such as gloves and safety glasses, when using these tools.
Step 3: Preparing the Ground
Before you start installing the fence posts, you need to prepare the ground. Clear the area of any grass, weeds, or debris. Use a shovel or a tiller to loosen the soil if it's compacted. This will make it easier to dig the post holes.
Mark the locations of the fence posts using the stakes and string you set up during the planning phase. The spacing between the posts depends on the type of fence and the manufacturer's recommendations. Generally, for a wooden or vinyl fence, the posts should be spaced 6 to 8 feet apart, while for a metal fence, the spacing can be a bit wider.
Step 4: Digging Post Holes
Use a post - hole digger to dig the holes for the fence posts. The depth of the holes should be at least one - third of the height of the fence post. For example, if you have a 6 - foot fence post, the hole should be at least 2 feet deep. Make sure the holes are straight and of uniform depth.
Once you've dug the holes, place a few inches of gravel at the bottom of each hole. This will help with drainage and prevent the posts from rotting.
Step 5: Setting the Fence Posts
Carefully place the fence posts in the holes. Use a level to ensure they are plumb (vertical). You may need someone to help you hold the posts in place while you work.
If you're using concrete to set the posts, mix the concrete according to the manufacturer's instructions. Pour the concrete into the holes around the posts, filling them about two - thirds full. Use a trowel to smooth the surface of the concrete. Let the concrete set for at least 24 hours before proceeding with the next step.
Step 6: Attaching the Fence Panels
After the concrete has set, it's time to attach the fence panels to the posts. For a metal fence, use brackets and bolts to secure the panels to the posts. Make sure the panels are level and evenly spaced.
If you're using a vinyl fence, the panels usually come with connectors that snap onto the posts. Follow the manufacturer's instructions to ensure a proper fit.
For a wooden fence, you can use nails or screws to attach the wooden planks to the posts. Start at the bottom and work your way up, making sure the planks are straight and evenly spaced.
Step 7: Finishing Touches
Once the fence panels are attached, check the overall alignment and stability of the fence. Make any necessary adjustments to ensure everything is level and secure.
If you've chosen a wooden fence, you can apply a stain or paint to protect the wood and enhance its appearance. For a metal fence, you can add a protective coating to prevent rust.
Step 8: Maintenance
Regular maintenance is essential to keep your fence in good condition. For a wooden fence, inspect it annually for signs of rot, decay, or insect damage. Re - stain or paint the fence every few years to protect it from the elements.
A vinyl fence is relatively low - maintenance. Simply clean it with a mild soap and water solution to remove dirt and grime.
For a metal fence, check for any signs of rust or corrosion. If you notice any, sand the affected area and apply a rust - resistant paint.
Conclusion
Installing a fence around your modern container house is a rewarding project that can enhance the functionality and beauty of your property. By following these steps, you can ensure a successful fence installation. If you have any questions or need further advice on installing a fence or purchasing a modern container house, don't hesitate to contact us. We're here to assist you with all your container house needs and help you make the best decisions for your project. Whether you're a homeowner looking for a new living space or a developer planning a container house community, we have the expertise and products to meet your requirements. Let's start a conversation about your next container house project and how a well - installed fence can make it even better.
References
- "Fence Installation Guide" by Home Depot
- "Modern Container House Design and Construction" by Architectural Digest